...
Step-by-step guide
Click on Phone Numbers -> Local Numbers, and then click the box at the top of the list to select all phone numbers. You can also click the gear symbol at the top to edit all numbers simultaneously.
| Info |
|---|
|

Click the Endpoint Group drop-down, and select your Endpoint Group, and click Save. (We reccomend adding a description for future reference)
| Info |
|---|
|

Confirm the DIDs/numbers are now assigned to that Endpoint Group. Your phone numbers will now be assigned to an Endpoint Group:
| Info |
|---|
|

...
Unassigned Numbers
Once you have ported in or purchased a phone number, you will see them in your inventory:

You can tell that this number is not assigned - it is missing an Endpoint Group designation:
When the number is not assigned, calling the number will result in hearing an error.
Configuring Phone Numbers
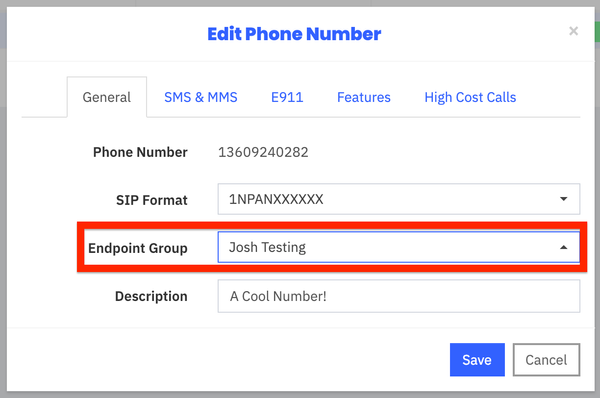
To configure your phone number and assign it to an Endpoint Group, click the little blue gear

Immediately you will land in the General tab. Simply select you desired Endpoint Group and click Save
Once your Endpoint Group has been assigned, you will now see it in the Inventory View:

Thats it! Now your inbound calls will go to your endpoint!
| Table of Contents |
|---|