...
Overview
3CX is gold standard in the commercial PBX world. Not only does 3CX have killer features, it also is easy to get up and running, and a pleasure to configure. You can learn more about 3CX here: https://www.3cx.com/
Additionally - here is 3CX's pricing: https://www.3cx.com/ordering/pricing/
Lastly - this is 3CX's excellent Administrator Documentation: https://www.3cx.com/docs/manual/
| Info | ||
|---|---|---|
| ||
Skyetel recently completed the Interop testing with 3CX and is now a certified SIP Trunk. We will update this guide once our template rolls out to all versions of 3CX |
Configuring SIP Trunks
As of this writing, Skyetel is not currently a part of 3CX's built in templates. (We are however working toward being added to their PBX). Because of this, we have to use a "Generic" SIP Trunk Setting.
Inbound SIP Trunk
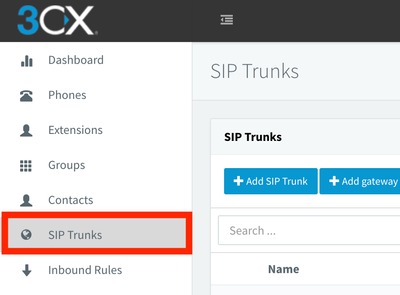
Step 1 - Navigate to the SIP Trunks Menu
The SIP Trunk Menu can be found on the left side of the 3CX administrator interface:
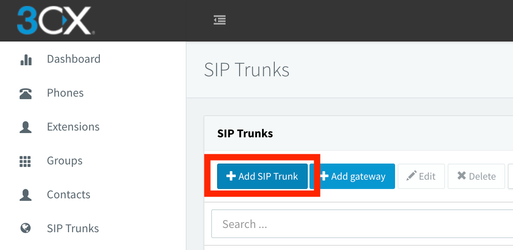
Step 2 - Click Add SIP Trunk
Step 3 - Select Generic SIP Trunk
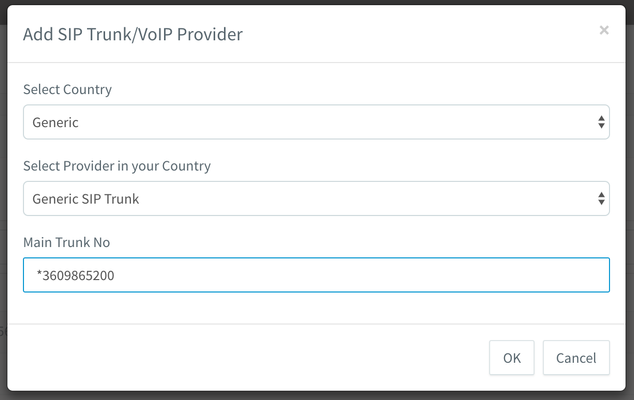
Your "Main Trunk No" should be the first number you plan on using on this SIP Trunk. We recommend using a wildcard (*) in place of a 1.
| Info |
|---|
Make sure your “Main Trunk Number” is unique per trunk. Adding the same trunk number will cause calls to be rejected by the PBX. The number specified here does not need to be a real number - 0000 or 1234 will work |
Step 4 - Add Skyetel's IPs to the
This option can be found in the "General" Tab
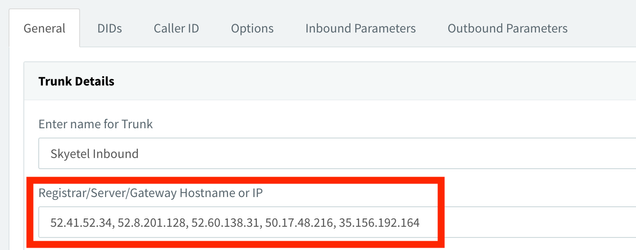
Here they are so you can Copy Paste ![]() :
:
| Code Block |
|---|
52.41.52.34, 52.8.201.128, 52.60.138.31, 50.17.48.216, 35.156.192.164 |
Step 5 - Update Options
Uncheck "Allow Outbound Calls"
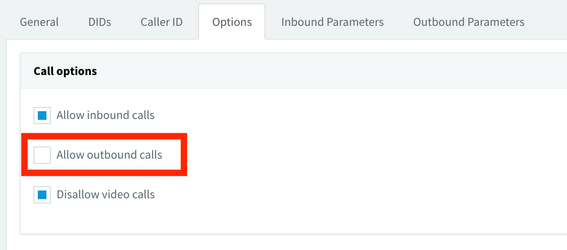
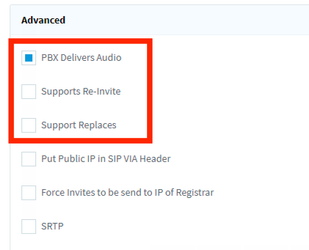
Verify that "Supports Re-Invite" and "Supports Replaces" are both unchecked and "PBX Delivers Audio" is checked:
Step 6 - Configure Inbound Parameters
This option can be found in the "Inbound Parameters" Tab
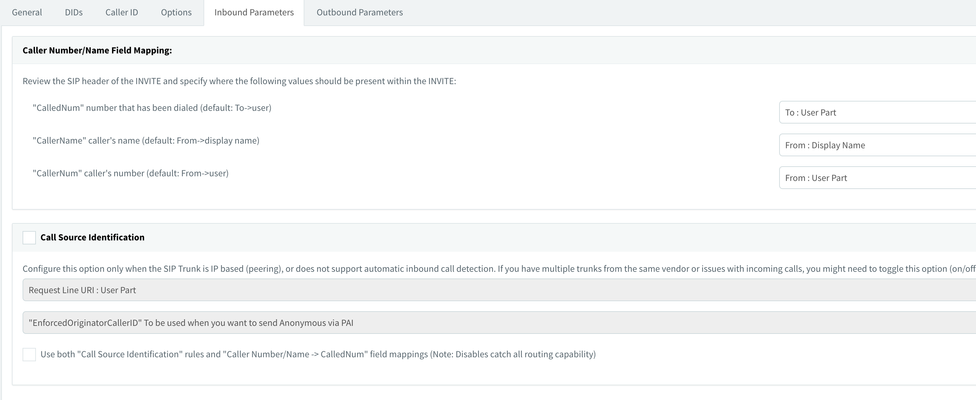
Make sure you set the following parameters:
"CalledNum" number that has been dialed (default: To->user) --→ To: User Part
"CallerName" caller's name (default: From->display name) --→ From: Display Name
"CallerNum" caller's number (default: From->user) --→ From: User Part
Also - uncheck "Call Source Identification"
Step 7 - Click Ok

You should now see your Skyetel Inbound Trunk in the list:

A Note About DIDs
By default, Skyetel routes all calls to the PBX using 11 digits. We do this in the SIP URI (the first line in the SIP INVITE packet). For example, when you call our number, this is what the SIP URI looks like:
| Code Block |
|---|
INVITE sip:13609865200@52.41.52.34:5060 SIP/2.0 |
However, in order to organize our traffic, we send all Caller ID information in E.164 format. Therefore, the TO in a Skyetel INVITE looks like this:
| Code Block |
|---|
To: <sip:+13609865200@52.41.52.34> |
This discrepancy can confuse 3CX - it would prefer that the To and the URI are identical. In order to accommodate this, we recommend you use a wildcard for your Skyetel numbers. Per 3CX documentation:
3CX will match the number inserted in this field with the “to” header, starting from the last part of the received string, thus avoiding any differences in the format of the number. For example, if you are based in the UK and your DID number is 0845-2304024, then you can enter the number *2304024. This will match any DID number inserted in the “to” field ending with these numbers, including +448452304024, 08452304024, 00448452304024, and, of course, *2304024.
https://www.3cx.com/docs/manual/inbound-rules/#h.kp49xtr98uu1
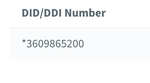
This means that we would recommend that you configure your DIDs in this format: *3609865200
Outbound SIP Trunk
Step 1 - Repeat Steps 1-3 from Inbound SIP Trunk
| Info |
|---|
Make sure your “Main Trunk Number” is unique per trunk. Adding the same trunk number will cause calls to be rejected by the PBX. The number specified here does not need to be a real number - 0000 or 1234 will work |
Step 2 - Add Skyetel's First IP to the
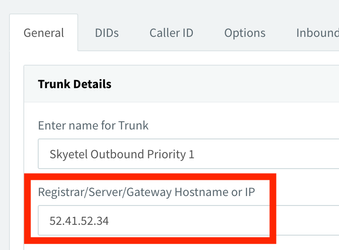
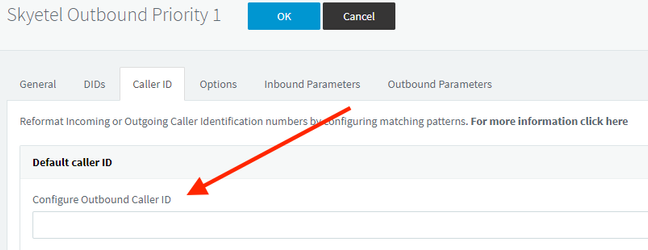
Step 2.5 (optional) - Set your Caller ID
This step is optional - but its a good idea to have a default Caller ID for your deployment
Step 3 - Set Trunk Options
Uncheck "Allow inbound calls"
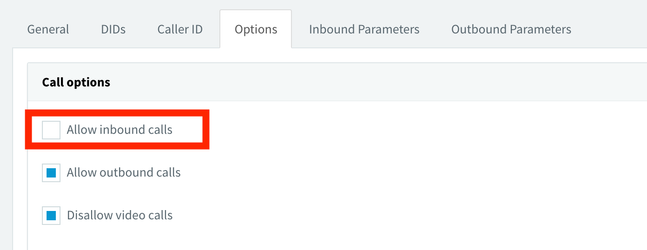
Verify that "Supports Re-Invite" and "Supports Replaces" are both unchecked and "PBX Delivers Audio" is checked:
Step 4 - Set Outbound Parameters
You can find these options in the "Outbound Parameters" tab
This menu has a lot of options, fortunatly you only need to set two
Step 5 - Click Ok
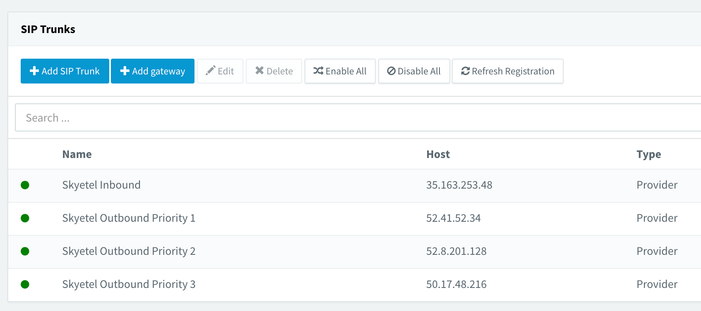
You should now see your Skyetel Outbound Priority 1 in the list:
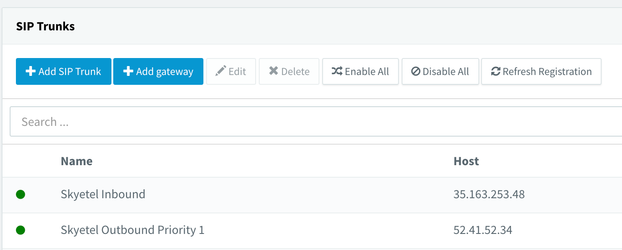
Step 6 - Repeat steps 1-5 until all of our Outbound IPs have been added
Once you are done, your SIP Trunk Menu should look like this:
Create your Outbound Gateway
This part is pretty cool - here you specify 3CX to use Priority 1 and then go through 1-4 in the case that one of our systems does not respond
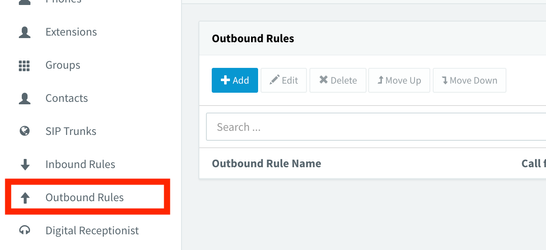
Step 1 - Navigate to the Outbound Rules Menu
It can be found on the left hand side of the Administrator Menu
Step 2 - Create the Outbound Priority List
Choose a name for your List
We like Skyetel Outbound ![]()
Set where these rules should apply
You'll need to specify this for your own uses, but we usually use the "Calls from extension group(s)" option and add the "DEFAULT" extensions
Set "Make Outbound Calls On"
This is where you can set our Trunks for your gateways:

Save your settings by clicking OK

Conclusion
Thats it! Your done! You should now be able to place and receive calls on our network using 3CX. We will update this guide when 3CX adds us to their Supported Providers.
...
| Redirect | ||||||
|---|---|---|---|---|---|---|
|